How to Whip Wax
Whipping, Piping, Grubby and Crumbles!
Published on
August 18, 2022 at 12:00:37 PM PDT August 18, 2022 at 12:00:37 PM PDTth, August 18, 2022 at 12:00:37 PM PDT
Whipped wax candles look delicious and can be customized in so many different ways. From a smooth creamy whip to crumbles for dessert candles!
Most waxes work to whip, some are definitely better than others and some are better for certain types of whips. The only wax that really doesn’t work to whip is palm wax and beeswax can be done but is tricky! It is important to keep in mind some of the creamier low melt point waxes will not do well in the heat so shipping or craft shows could be tricky! Adding stearic acid to the wax can help harden it up though.
WATCH US TALK ABOUT WHIPPING WAX AND GO THROUGH SOME TECHNIQUES HERE!
Creamy Whip: A creamy whip is similar to an icing look with small peaks and valleys. A container paraffin blend wax is easiest to achieve this look.
- - Wait for the wax to begin to cool, a film we develop over top of the container.
- - Use a spoon to start stirring it in a whipping motion.
- - Once the wax is thick enough to hold its shape, pour into your container and use a spoon to add some fun picks and valleys.

Piping Whip: A piping whip is made up using a piping bag to pipe the wax on top of the candle. This technique is used on cakes and cupcakes. Piping tips can be used for a fun effect, just make sure the tip is wide enough or the wax will not come out. Just a piping bag with the tip cut off can also be used. A low melt point wax pliable wax is best for this type, either a paraffin container blend or coconut blend work great!
- - Allow to wax to cool in the pot and stir randomly to make sure none is completely solid.
- - Once the wax is cooled down and is thick enough to dollop it is ready to be poured into the piping bag.
- - When piping wax make sure to squeeze to the bottom then twist the top so no wax escapes out of the top.
- - Pipe in a circular motion to create a dollop effect or be creative and make your own design!

Grubby Whip: This technique was very popular in the 90’s as a grubby candle, it is a more primitive look. Most waxes work to create this look!
- - In a metal bowl allow your wax to cool and create a film over top.
- - Use a hand mixer to blend the wax on the lowest setting. (Be careful as hot wax is very liquid!)
- - Whip on and off for a few seconds at a time.
- - The wax will begin to get chunky but fluid, once the wax holds its shape a bit, it's ready!
- - Take your votive or pillar and roll it around in the wax, holding onto the wick at the top.
- - Place the candle on wax paper to cool.
- - For a more intense look drizzle some of the wax onto the top and sides of the candle as it’s cooling

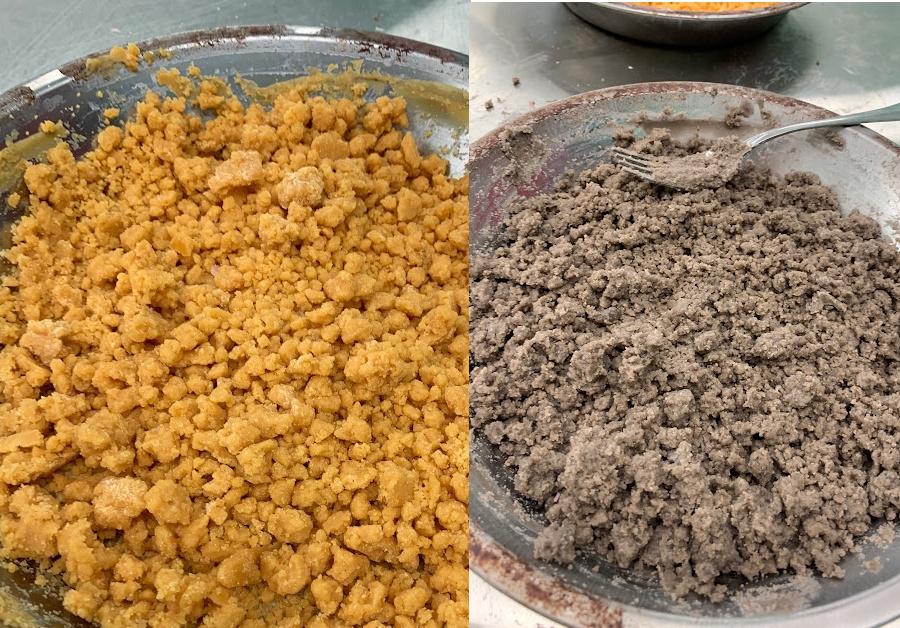
Crumbles Whip: Wax crumbles are perfect to add some texture to dessert candles! They can be put on top for a finishing look or can be used in layers to create a crumble. A harder paraffin wax is best for this technique so it holds shape.
- - In a metal pie plate or other metal shallow container pour your wax.
- - Allow the wax to cool so there is a skin layer on the top and sides begin to harden. Don’t worry as this technique cools the wax the most before beginning to whip. The wax can always be reheated if it does cool down too much.
- - Use a metal fork and scrape across the bottom in a linear motion. This breaks the wax up and helps it to cool.
- - Keep going with this technique until you have crumbles. It could take 5-15 minutes to achieve the crumble!