Watermelon Layer Candles
How to make watermelon candles
Published on
July 12, 2022 at 1:21:11 PM PDT July 12, 2022 at 1:21:11 PM PDTth, July 12, 2022 at 1:21:11 PM PDT
These awesome watermelon candles are made by pouring the wax in layers of colors into your jars. We will be using 3 different colors: green for the rind, white for the middle and pink for the watermelon part.
The easiest way to make any layered candle is to use a single pour wax with little shrinkage. Paraffin/Vegetable blended waxes and soy waxes made for votive and pillar candles work very well for these layered candles. We have many different waxes that will work great for these candles!
Skill Level: Intermediate
Duration: 1 hour plus cooling times
Makes: As many as you want!
Ingredients:
- Single Pour Container Wax
- Pre-tabbed Wicks
- Watermelon Fragrance Oil
- Hunter Green Liquid Candle Dye
- Kelly Green Liquid Candle Dye
- Magenta Liquid Candle Dye
Equipment:
- Candle Jars (we used Laconic)
- Wick Tape
- Wick Holder
- Burning Instruction Labels
- Scale
- Thermometer
- 3 Metal Pouring Pitchers
- Melter or double boiler
SHOP ALL INGREDIENTS AND EQUIPMENT HERE!
Instructions:
- 1. Prepare your work area and gather your materials. Turn your melter or griddle to 200 degrees or set up your pan of water and melting pots if you are double boiling your wax.
- 2. Calculate how much wax you will need and heat your wax.
- 3. While your wax is melting, wick your jars and affix your burning instruction labels to the bottoms.
- 4. Add 1 oz. of scent for every 1 lb. of melted wax when wax reaches desired melted temperature.
- 5. Divide the wax in three portions:
- - 50% of the wax will be pink,
- - 30% of the wax will be green
- - 20% will remain white.

It’s better to start with small amounts of the dye because you can always add more to reach your desired color. Stir the wax with your thermometer until the color is well dissolved. You can test your color by putting a drop of wax on a white piece of paper. Keep in mind that when the wax is hardened it will appear lighter than it looks in the melting pot and darker than it appears on the white piece of paper.
- 6. Add Magenta liquid dye to 50% of the wax and test your color.
- 7. Add Kelly Green for lighter color or Hunter Green liquid dye for a darker color to 30% of the wax and test your color
- 8. Leave the remaining 20% of wax white.
- 9. Pour the green wax into the bottom of your jar slowly but smoothly trying not to drip on the sides of the jar. About 1/4 full and remove any wax that may have splashed on the sides while pouring. These wax spills will mix with your other colors if they are not removed from the jar before pouring the next layer.
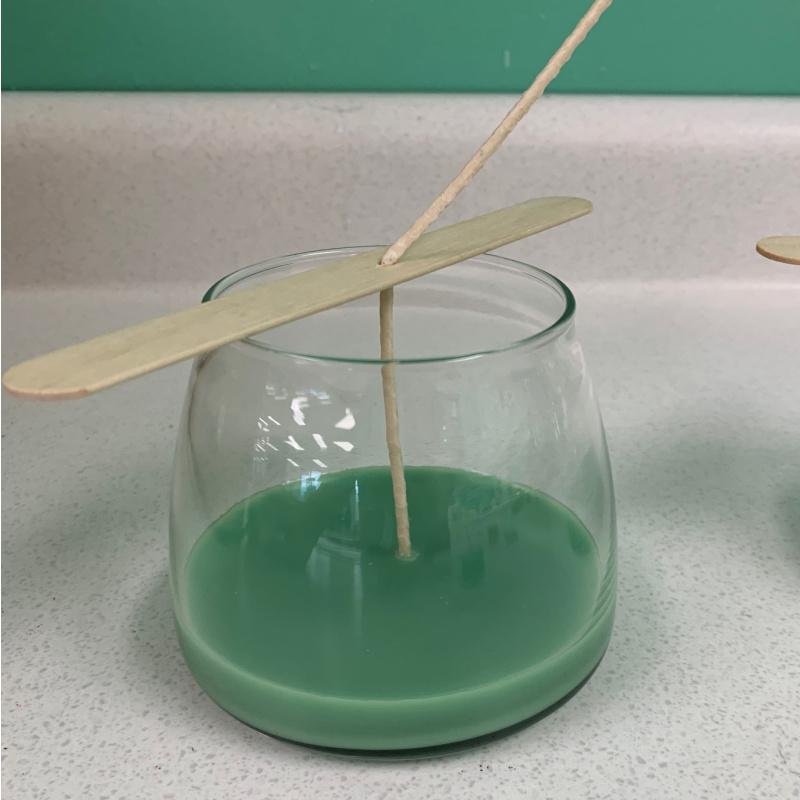
- 10. Wait about a half hour for the green wax to cool before pouring the next layer. The wax should be cool enough to withstand pouring the next layer without breaking through and mixing.
- 11. Pour the uncolored white wax layer at a lower temperature, should be about 1 cm in thickness, this should be your thinnest layer.

- 12. Wait approximately another half hour and then pour the pink layer to top the candle off.

- 13. Let wax cool and cure. Enjoy your candles!
DOWNLOADABLE PDF
